
We all know that 3D printing is great, nowadays there exists 3d printers as cheap as a couple of hundred bucks which are just as easy to use as a toaster. However this is true for the most basic filaments and parts: once your parts have special needs (high accuracy or special materials), printing them can can get tricky.
I started my 3D printing journey six years ago with a Creality CR10. At first my needs were pretty basic: I was developing an automatic wharehouse (you will find an article about it soon, hopefully) and all I needed were strong parts with reasonable dimensional accuracy. Out of the box the printer could fullfill quite well my needs but as my projects become more demanding in terms of printing quality and the materials needed, I had to upgrade the printer. Mainly, I started needing parts to withstand temperature higher than what PLA can (in fact, it ieasily deforms if left under the sun in a sunny day). So I started experimenting with PETG and ABS. Both of them were not as easy to print as PLA: PETG needed to be well dehumidified, ABS needed an heated chamber in order to acheive good layers adehision and prevent warping. To tackle the dehumidification is
Construction
after some calculations (explained below) and experimentations I come out with the design of which construction is explained in the following paragraphs. The main idea summed up in the following sketch
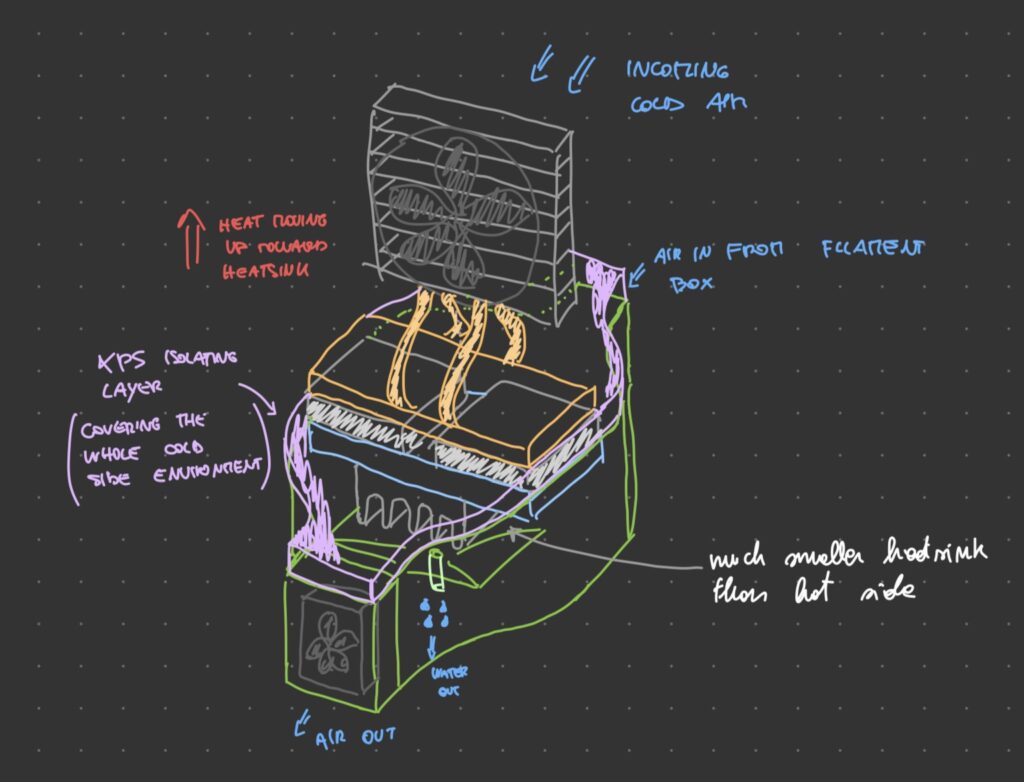
The device is composed of a cool chamber where the air is forced to an heatsink kept around 0°C where it cools under dew point and looses its water content, and an hot side where the heat pumped from the cold side is dissipated by a CPU heatsing and a fan. To allow for lower temperature in the cold chamber the latter is thermally shielded with XPS insulation material
All the plastic parts were printed using red PETG. I decided to go with PETG in order to whithstend the “high” temperature at the hot side (around 45°C, which is high enough to deform PLA), and red cause it looks cool
Assembly
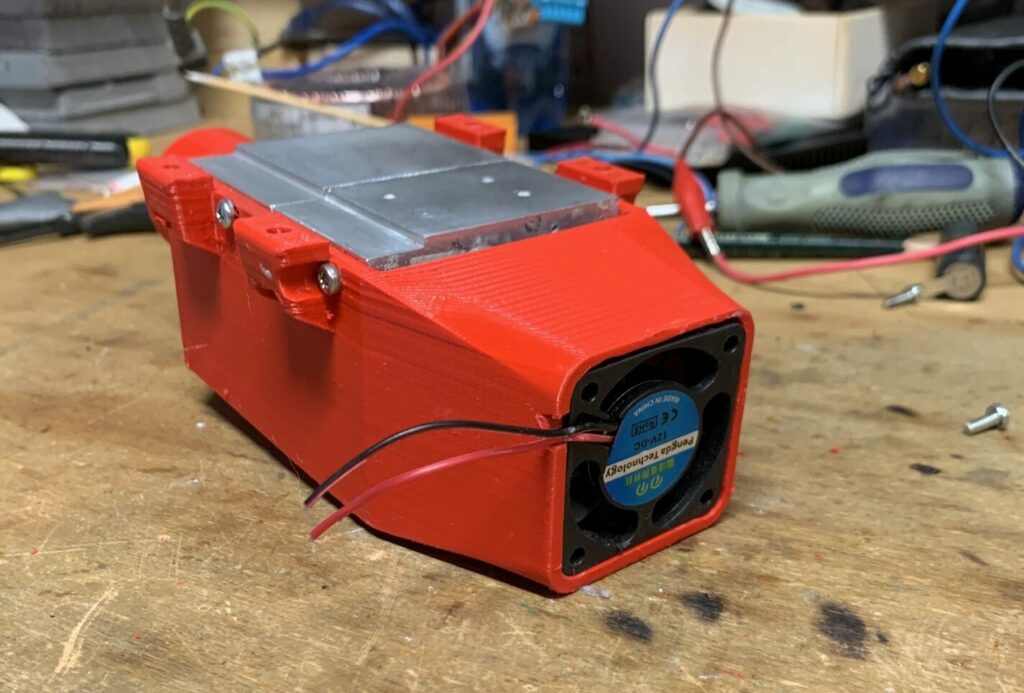
Installing the cold-side heatsing and cold side fan
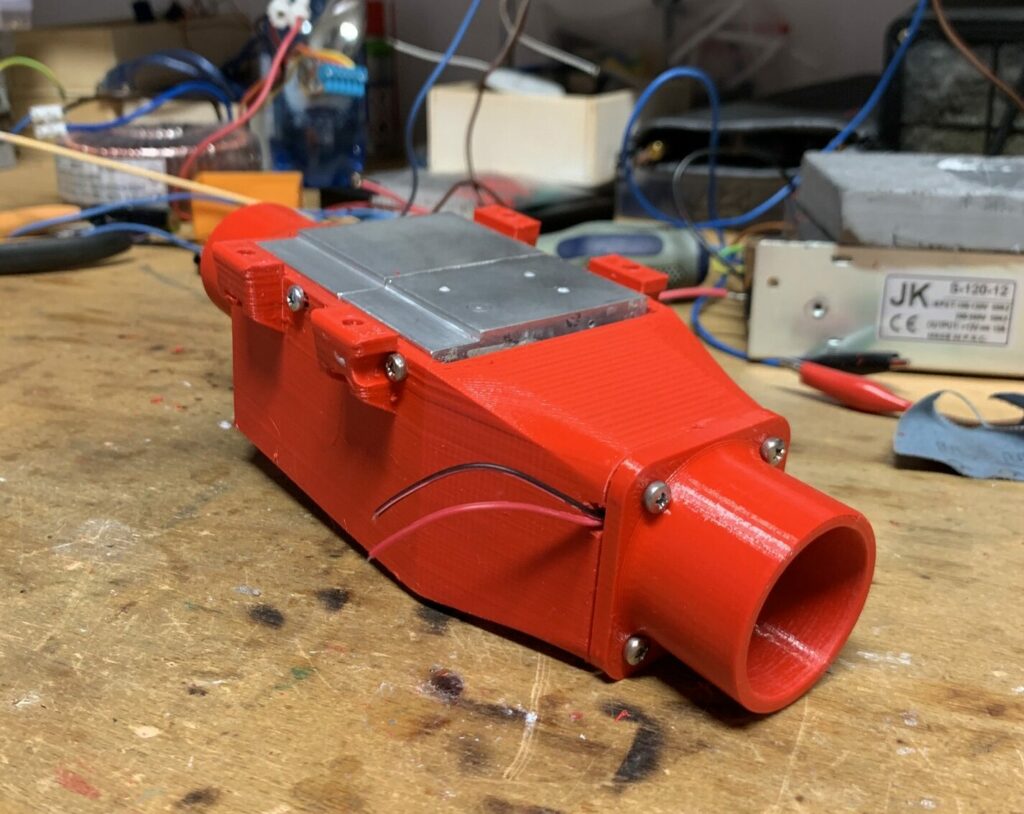
adding the tubing attachment over the fan
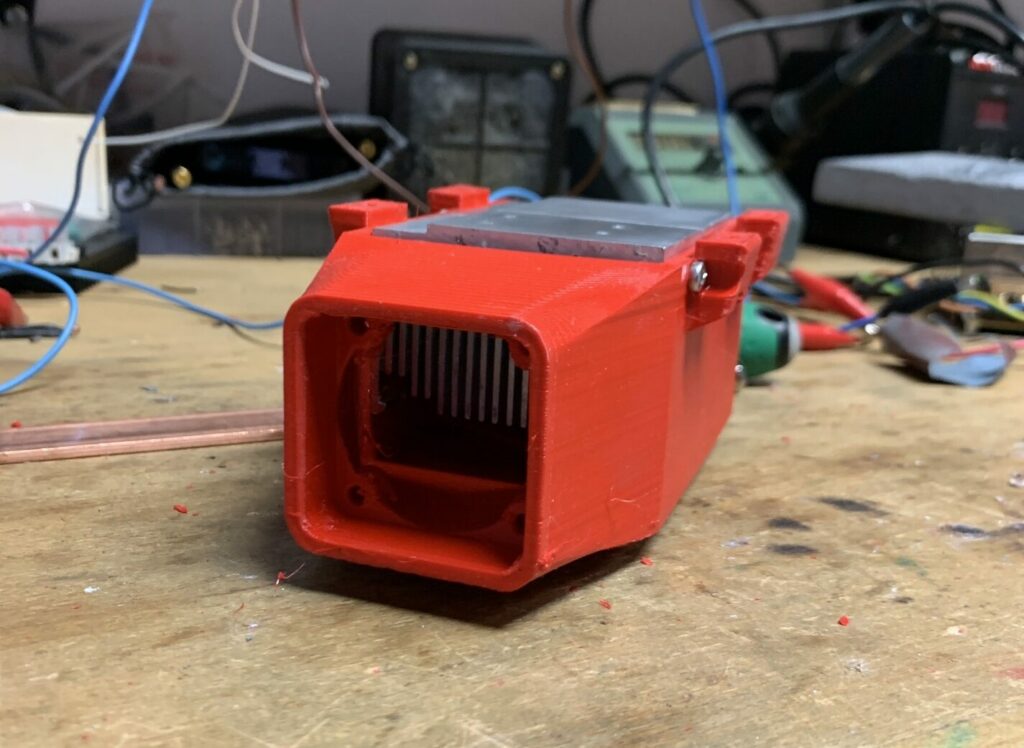
detail of heatsink fins inside of the cold-side chamber
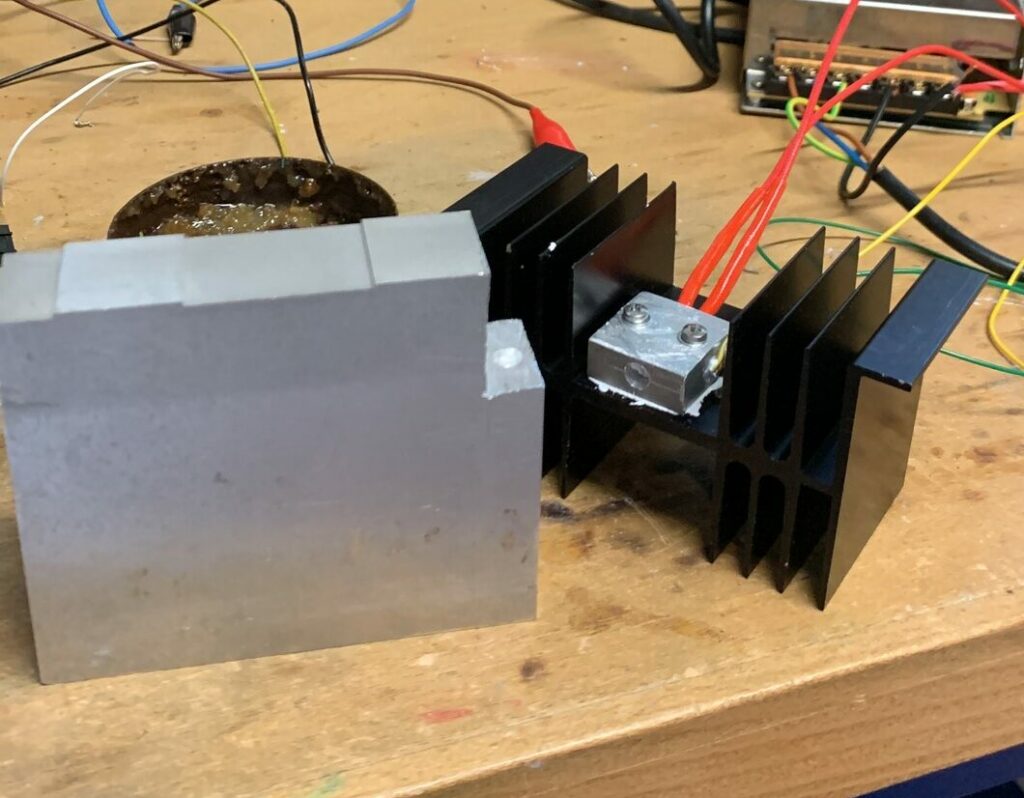
adding thermal paste and the two peltier cells
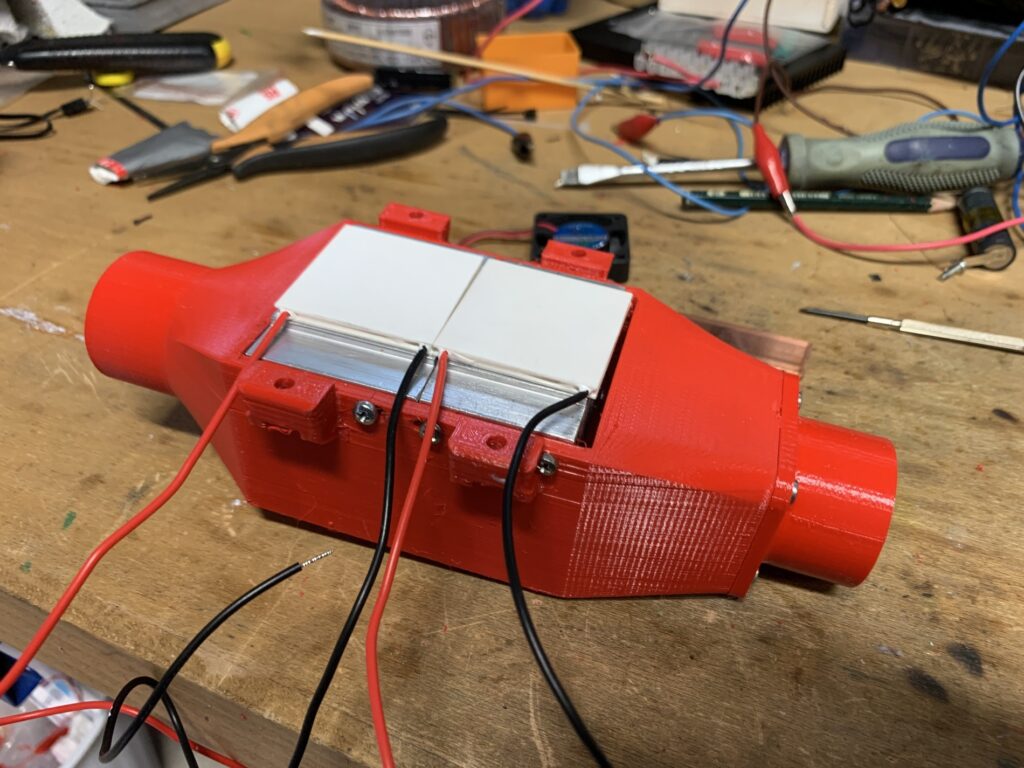
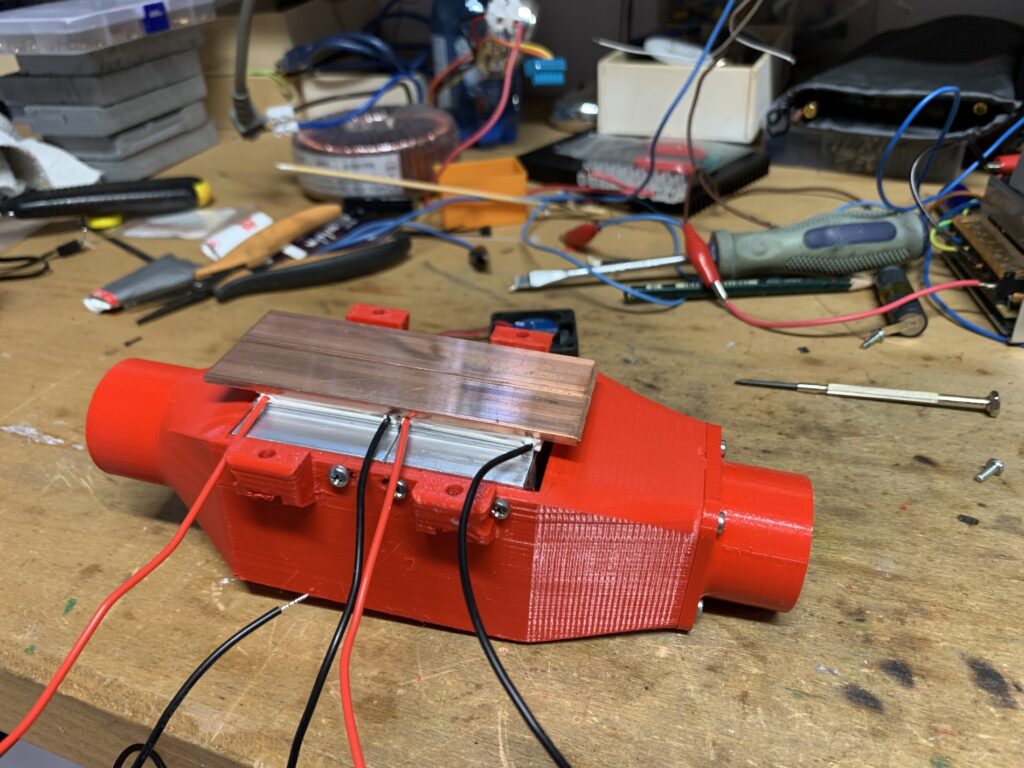
to uniform the head pumped by the two peltier cells two copper plates were put on top of the peltier cells
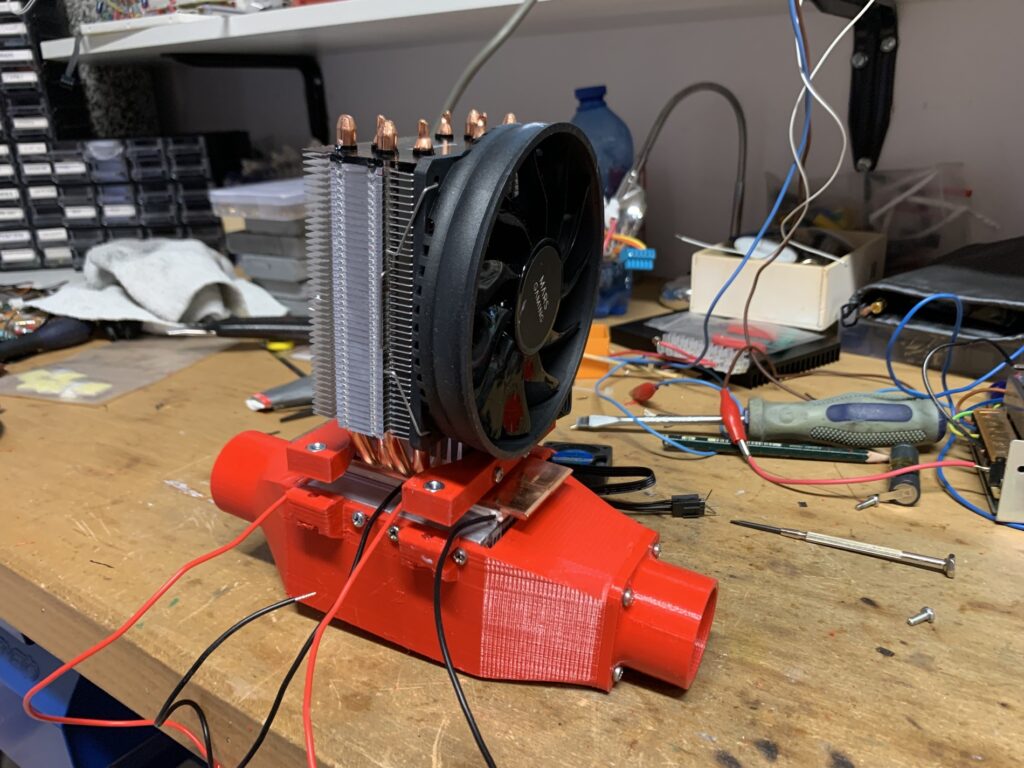
adding hot-side heatsink and fan
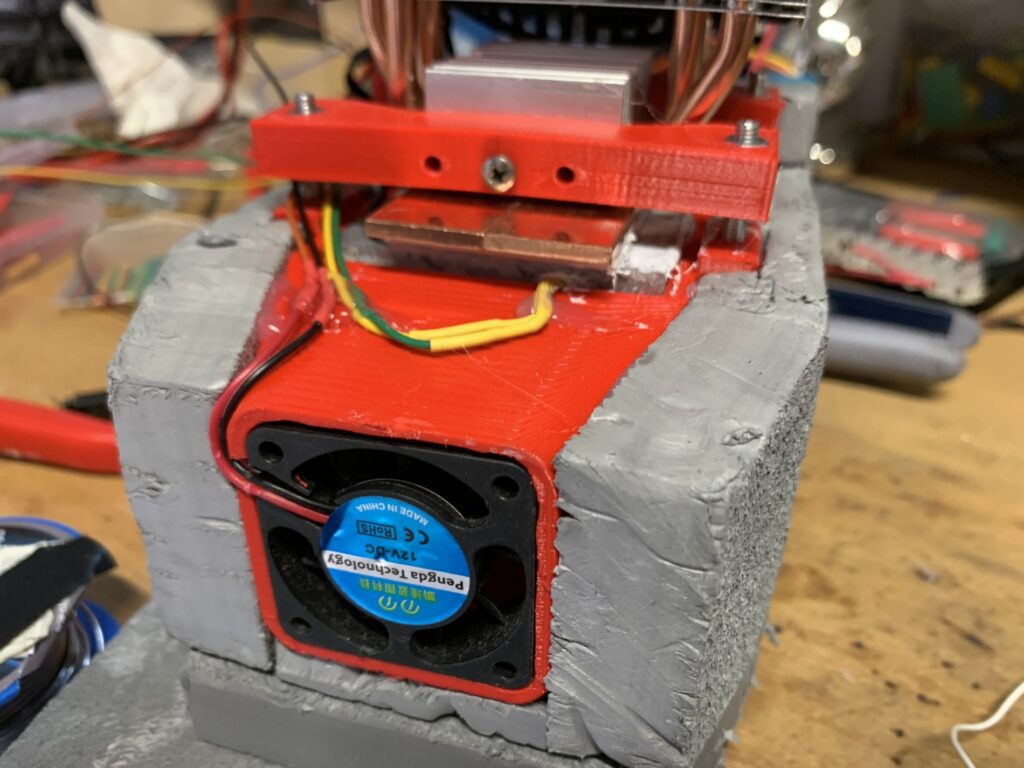
adding cold side thermistor and thermal insulation around cold-side chamber
Heater
Since relative humidity (RH) is the percentage with which air is filled with water and the maximum content increases with temperature, if keeping water content constant the themperature is increased RH decreases. The issue without a heater inside of the filament storage box is that the dehumidifier cools air and minimum RH value stay pretty high (around 25%)
Adding a 30W heater like shown above
Allows to rise the temperature to around 35-38°C (in winter, with an outer temperature of 20-21°C) lowering RH value to near 5-6%
Putting it To Action
In order for the dehumidifier to perform its task efficiently, it needs to operate in a sealed and thermally isolated environment. To Initially test the setup I made a simple box with the heater element in it and connected to the dehumidifier
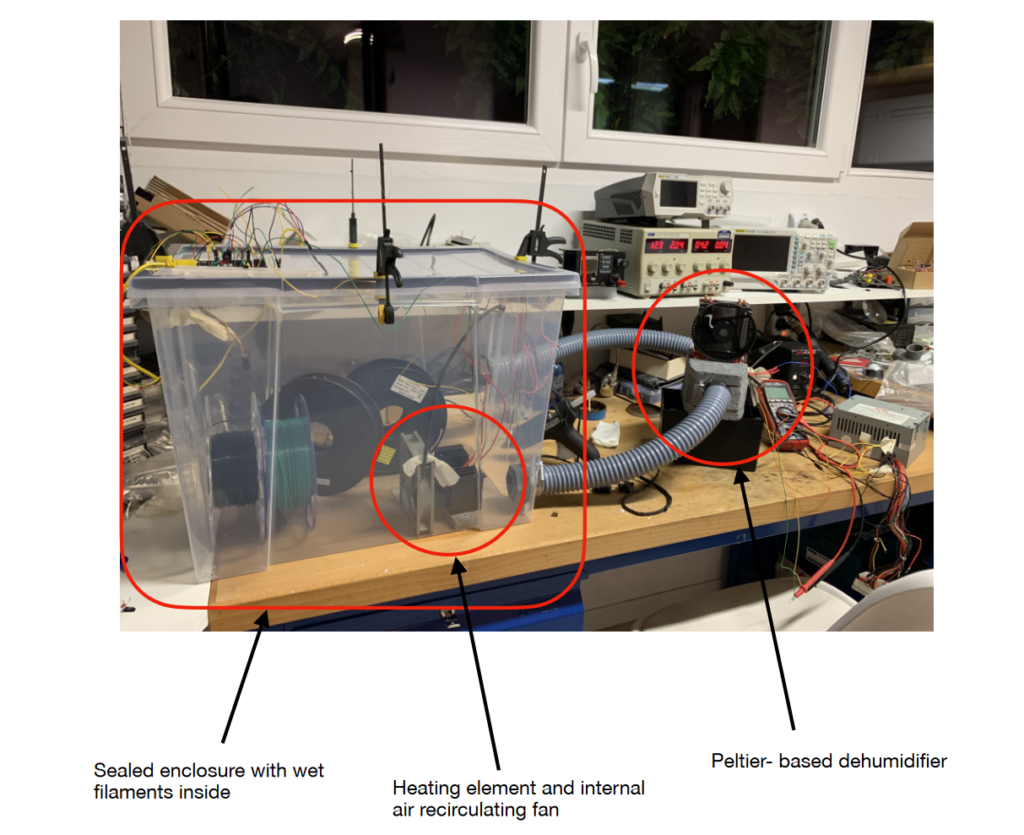
The test setup was as follows
- Peltier dehumidifier: main component of dry filament box. It is there to cool air under dew point removing water from it. It is powered from a PC power supply at 12V drawing around 6-8 Amp
- Fan inside storage area: helps uniforming air temperature and RH value inside the whole volume of the container
- Heater: heats air inside of the box thus reducing RH value with the same water content
- Arduino and SI7006A: SI7006A is a precision humidity and temperature sensor (https://www.silabs.com/documents/public/data-sheets/Si7006-A20.pdf) which can measure RH down to 0%
Results
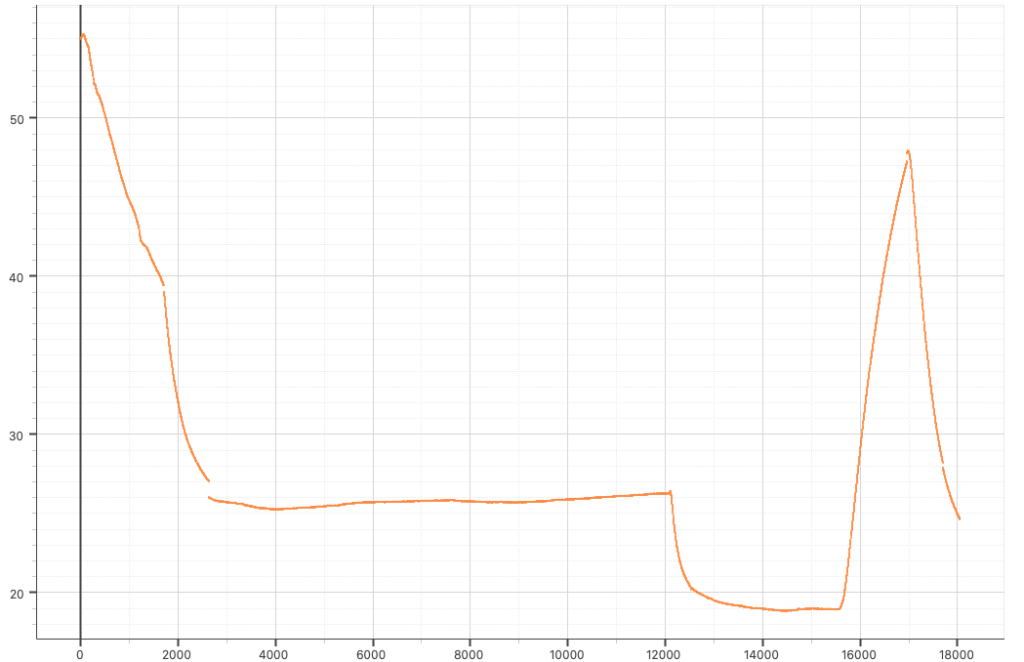
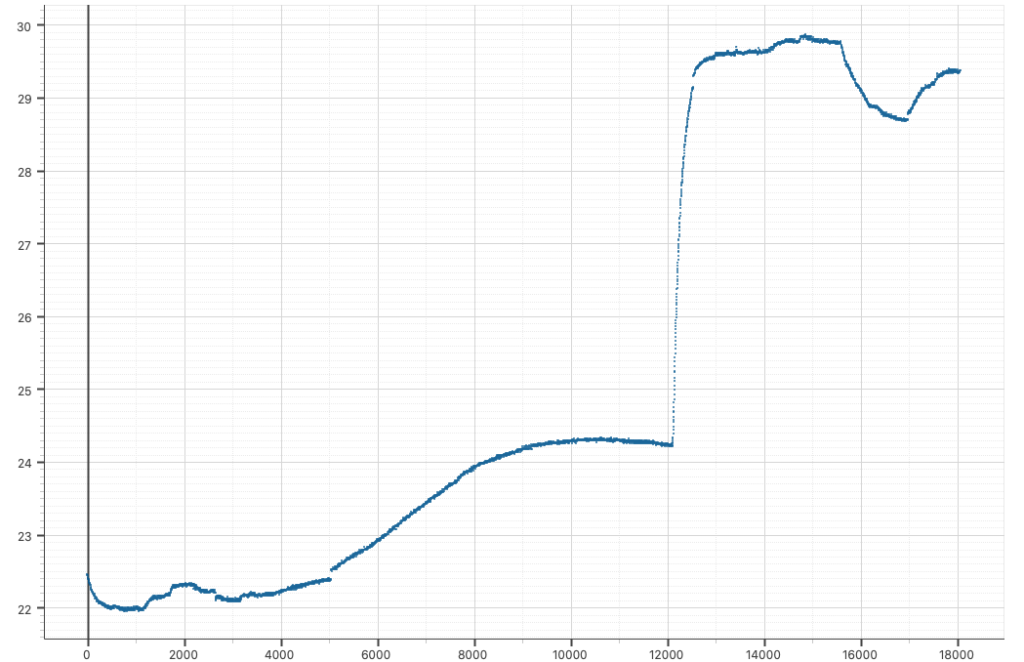
The images above show humidity and temperature in the following situations:
- To start I enabled the Peltier dehumidifier only. Fan and heater were turned off. It can be seen that the decrease of RH is not very steep and temperature decreases a little
- I then tunerd on internal fan and this helped remove humidity from air much more quickly, reaching at the end around 26%
- After letting the value settle I switch the 30W heater on: this increased the temperature up to almost 30°C and RH dropped to around 19%
- Then I switched off the Peltier element and the graph shows how quickly RH value increases
- In the last phase I switched on the dehumidifier, internal fan and heater and from the graph it can be seen that the slope of RH is quite steep
Storage Box Thermal Insulation
Adding XPS material for thermally insulating the filament box allows to reach internal temperatures as high as 45°C. This lowers RH% dramatically at around 5-6%


